

How to Configure a Microphone via RDP on Windows Server: A Step-by-Step Guide
If you connect to Windows Server via RDP and find that your microphone is not working, it is likely not an issue with drivers, antivirus, or sound settings, but rather an architectural limitation of the Remote Desktop protocol itself. In this article, we will explain why this happens and what to do, using a clean installation of Windows Server 2025 as an example.
Diagnostic Checklist: Where to Start
Before proceeding with the RDS role installation, make sure the issue is indeed related to the session architecture and not something simpler. Go through the items below to eliminate trivial causes.
1. Check microphone permissions on your local computer
On macOS: System Settings → Privacy & Security → Microphone → ensure that Microsoft Remote Desktop / Windows App is enabled in the list.
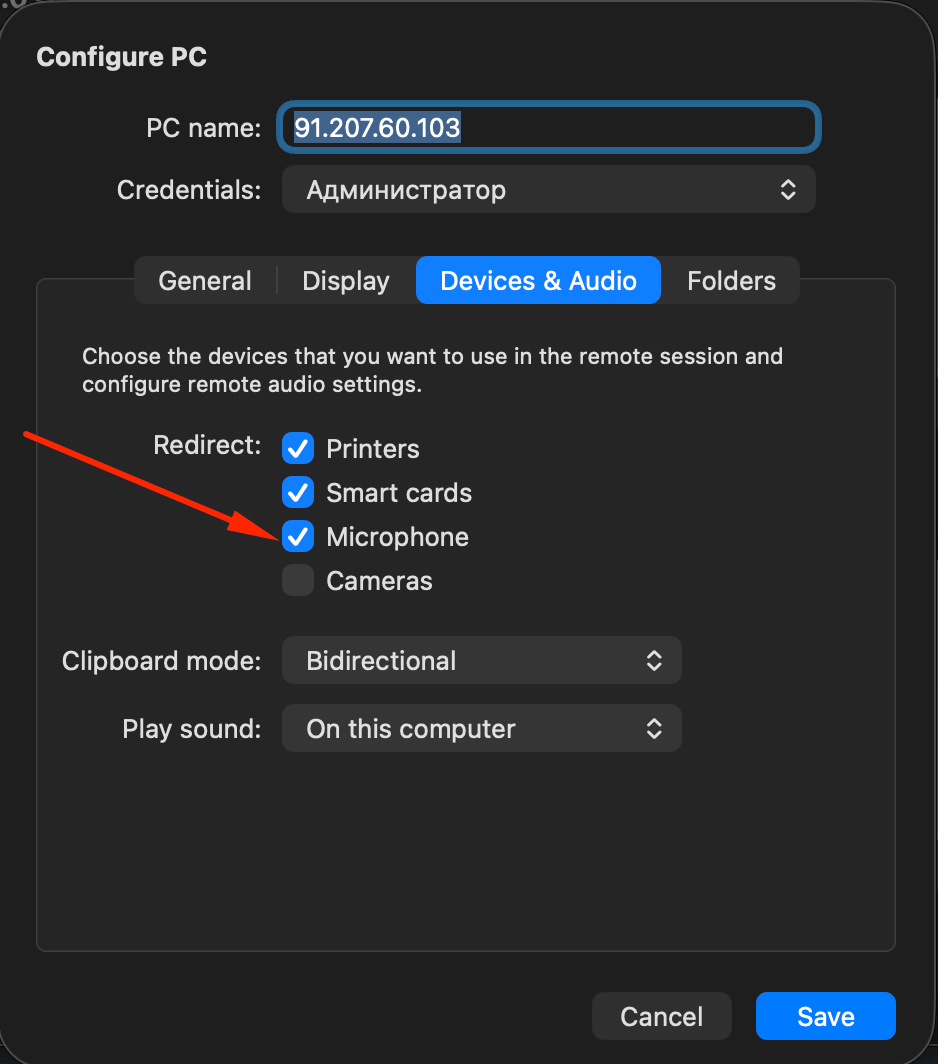
In the RDP client itself: when setting up the connection, make sure the checkbox is enabled (macOS client) - Devices & Audio - "Microphone"
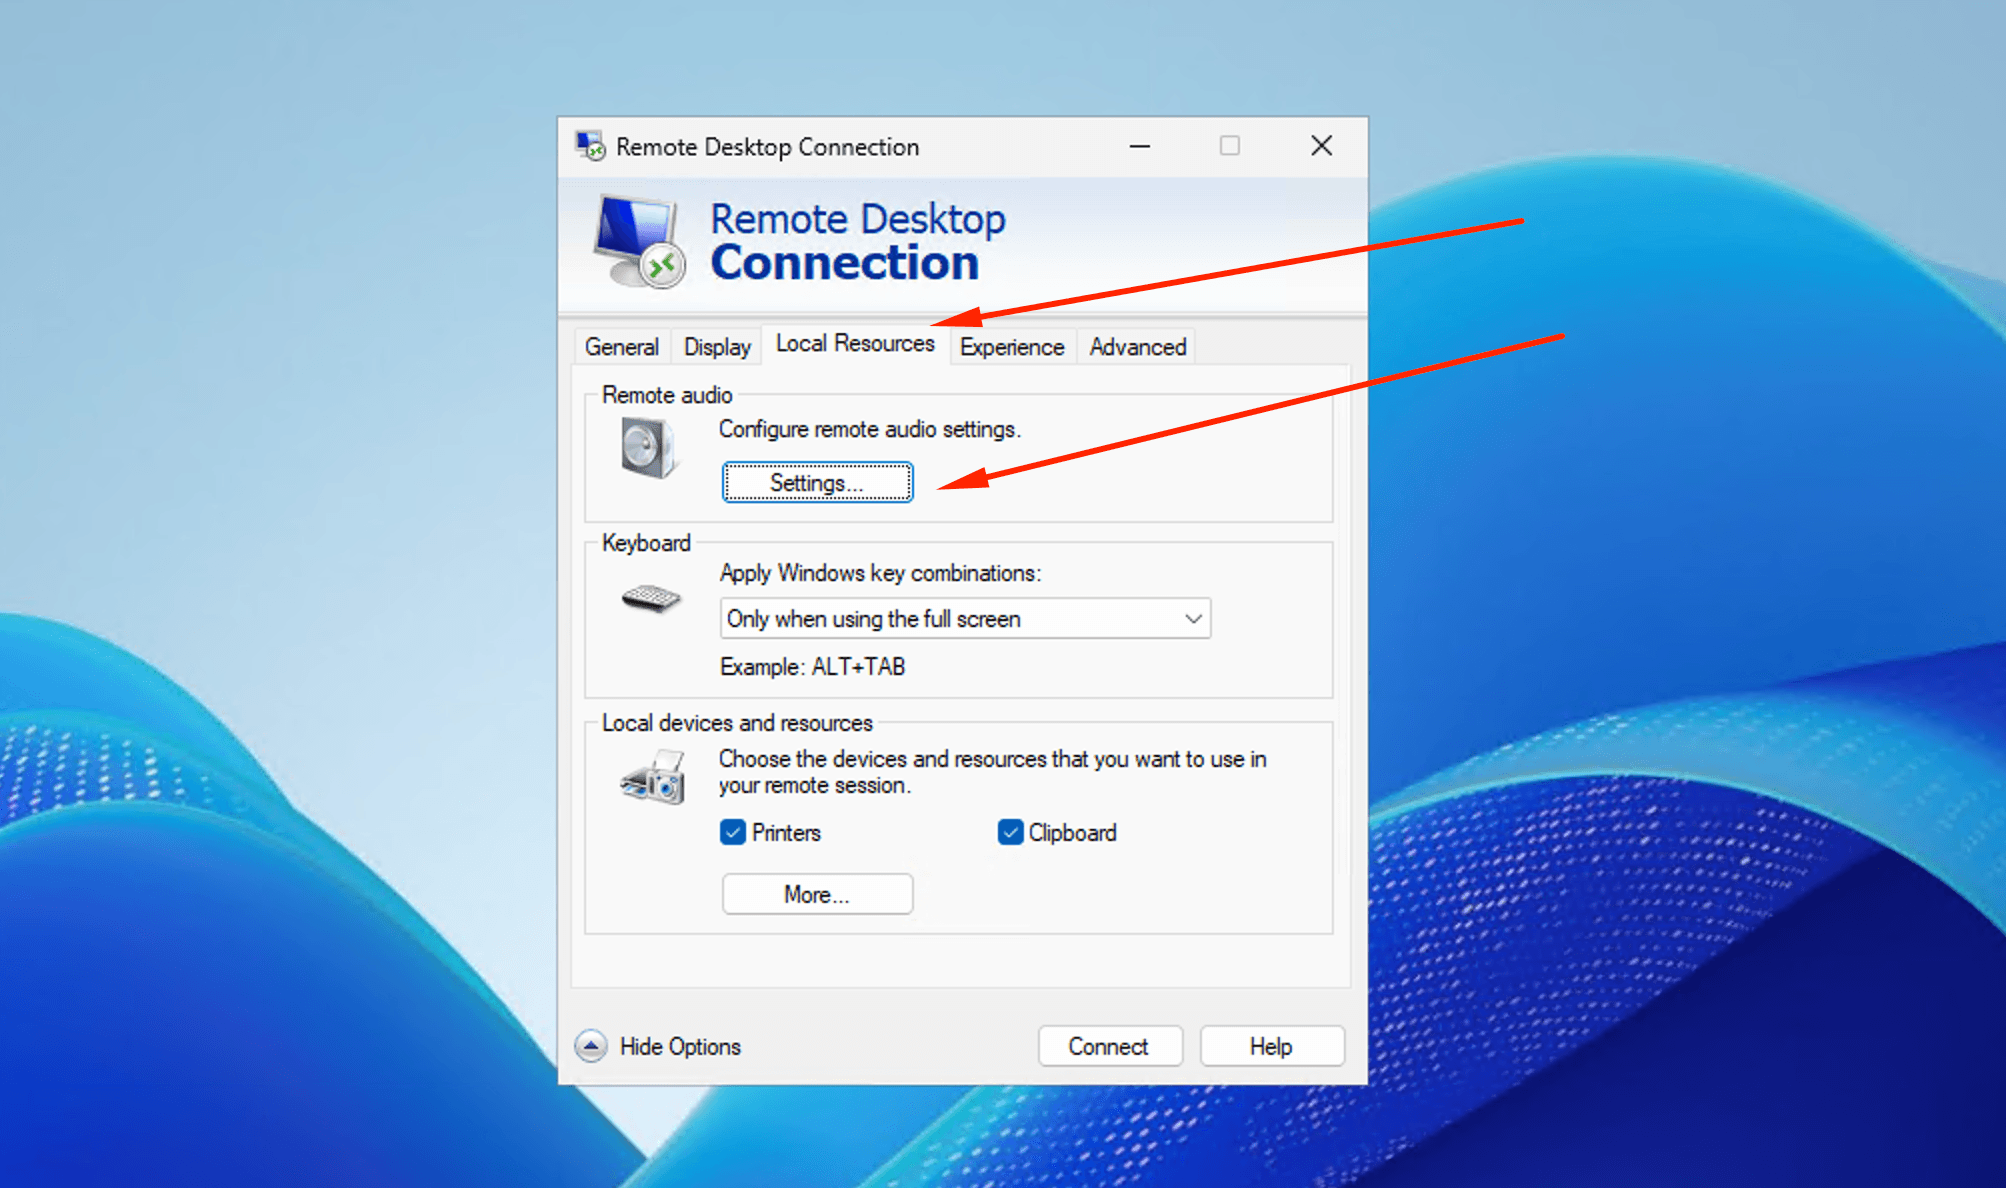
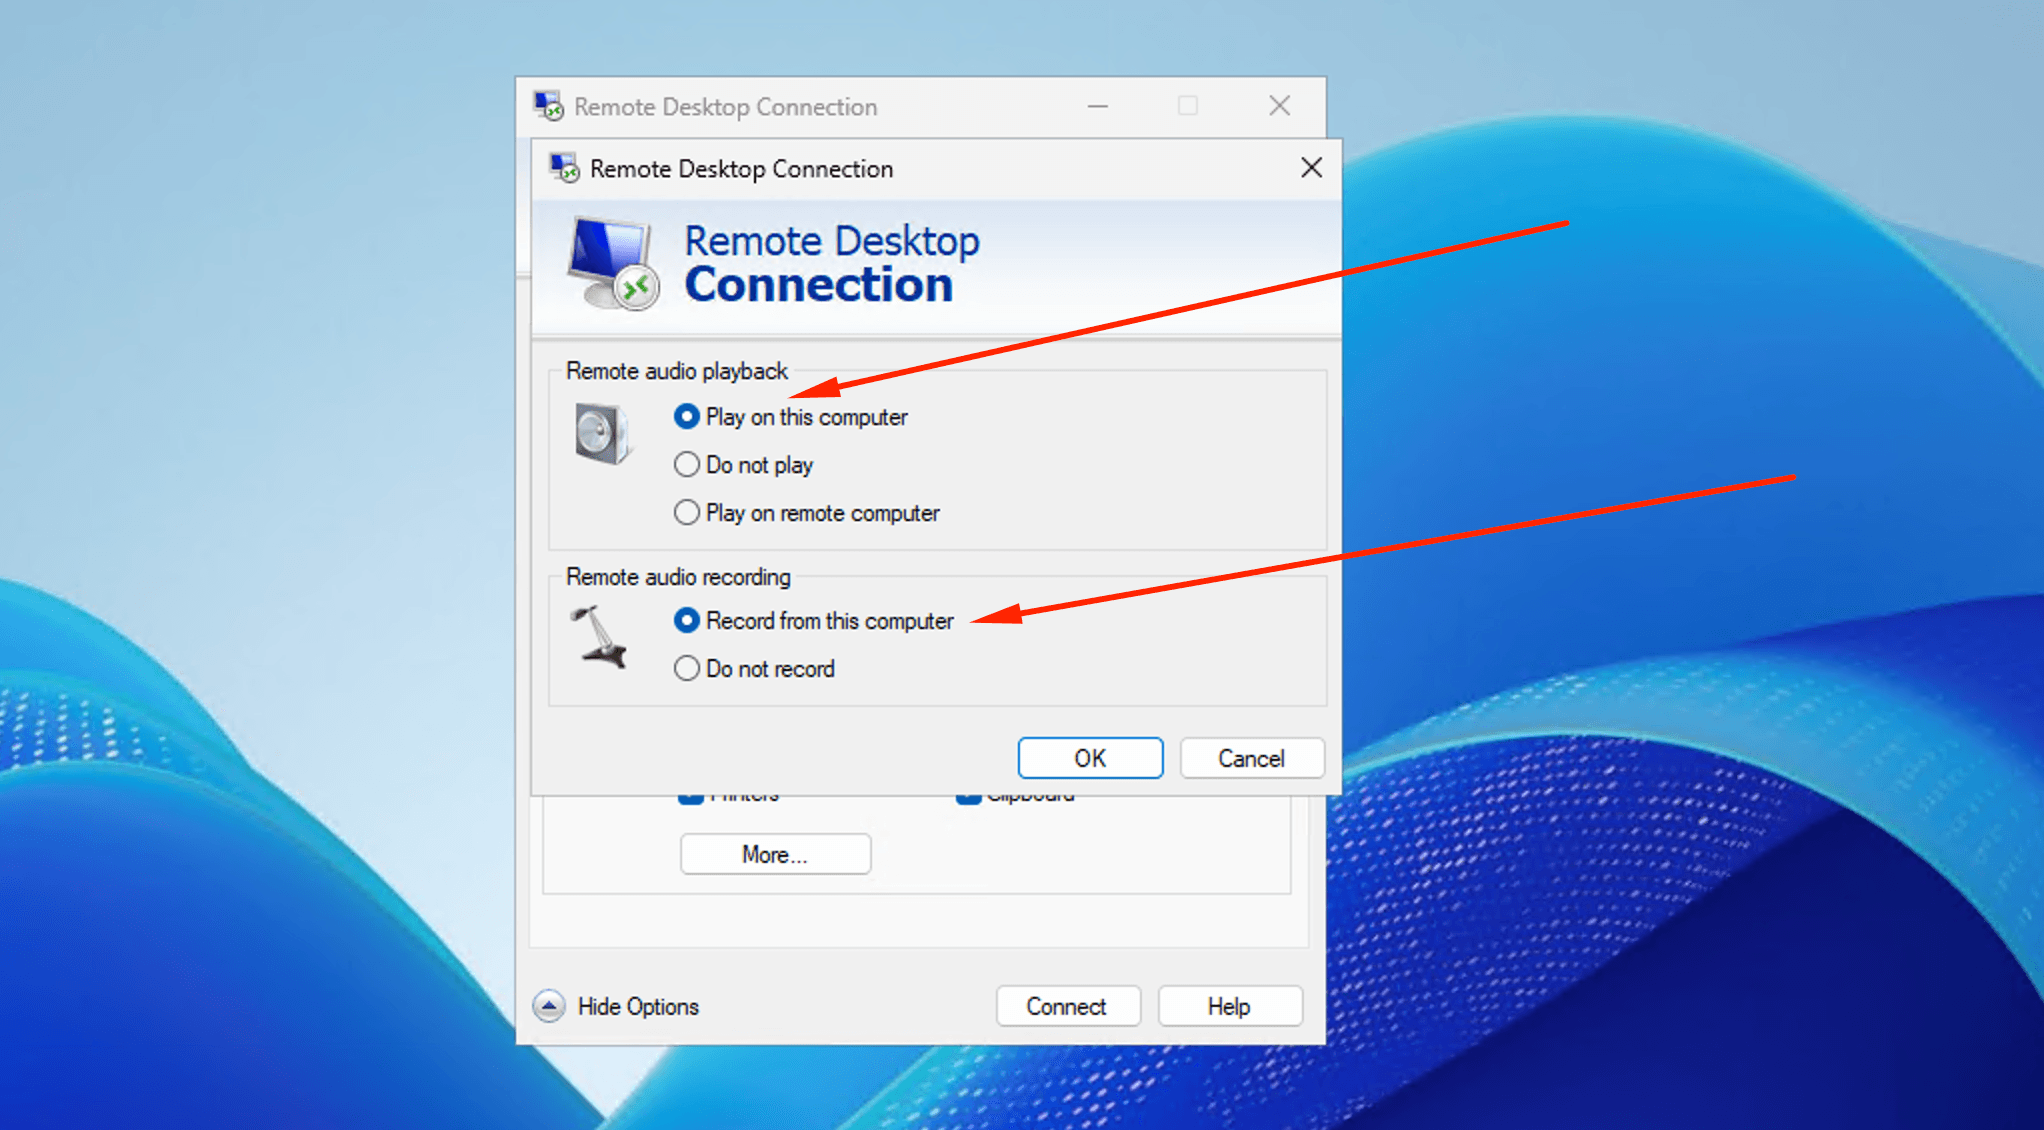
In the Windows client: "Remote Desktop Connection" — Local Resources → Remote audio → Settings → Record from this computer.
2. Check the registry and group policies on the server
To allow redirection, you need to enable the corresponding policies on the server:
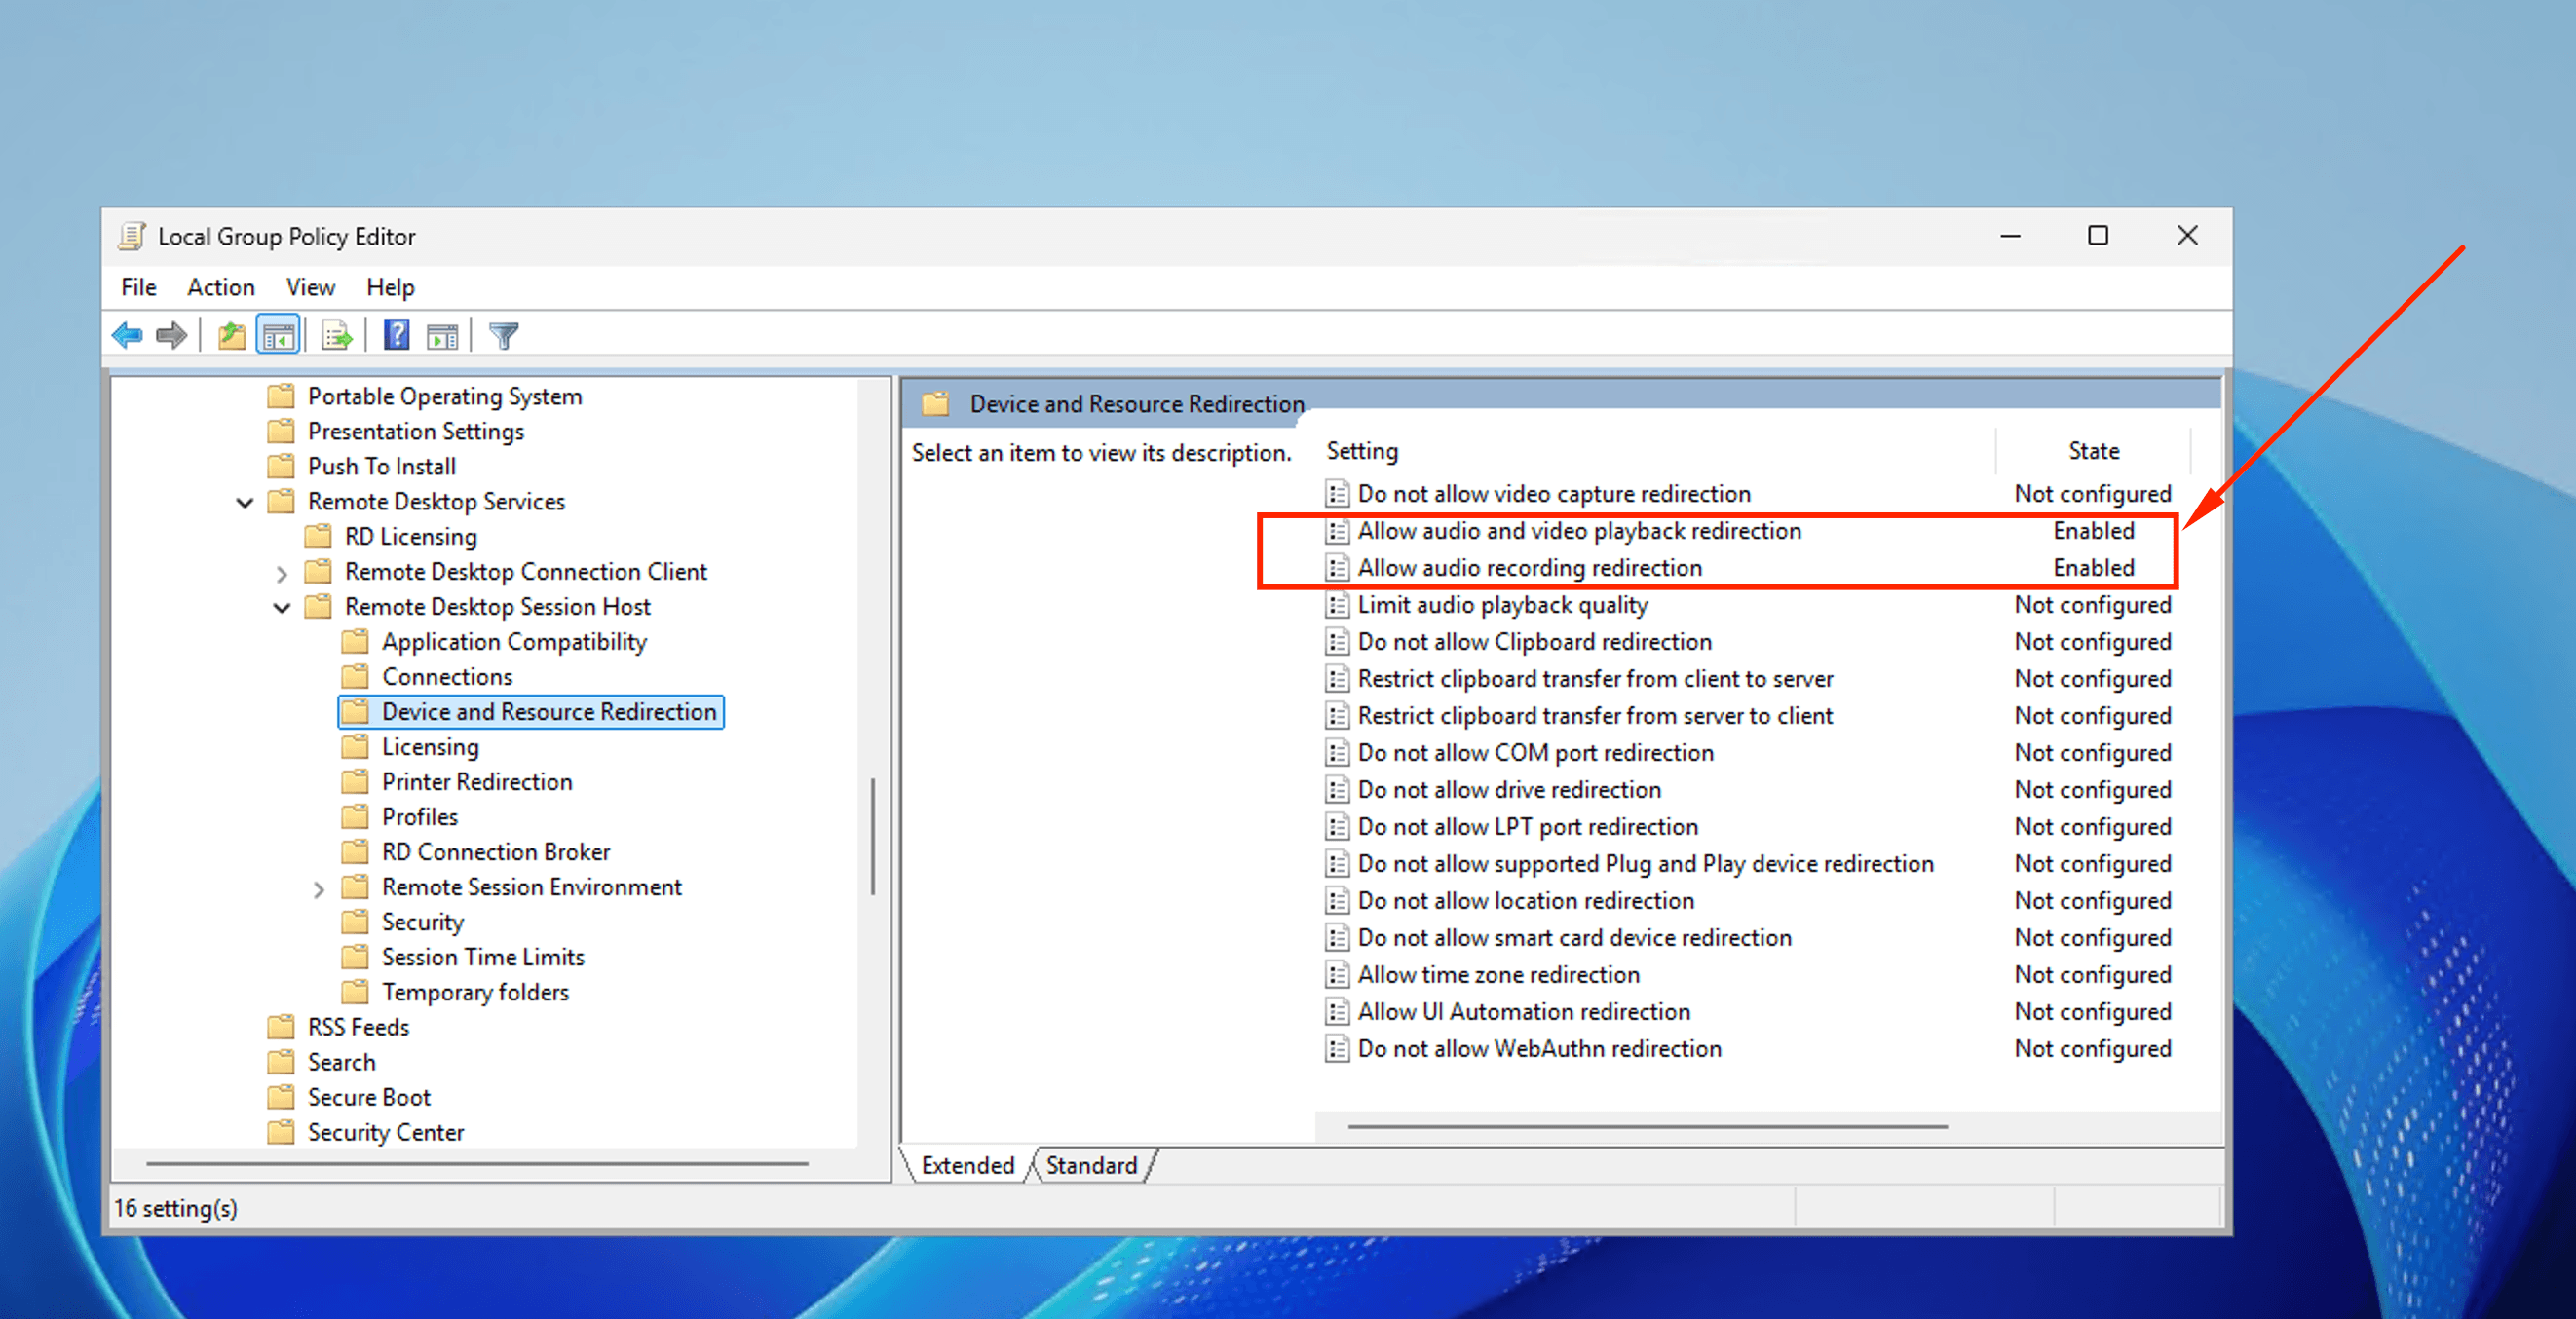
- Press Win + R or Command (⌘) + R on Mac, type gpedit.msc in the command prompt that opens, and press Enter.
- Navigate to: Computer Configuration -> Administrative Templates -> Windows Components -> Remote Desktop Services -> Remote Desktop Session Host -> Device and Resource Redirection.
- Find and enable (Enabled) the following settings:
Allow audio and video playback redirection.
Allow audio recording redirection.
- After changing the policies, it is recommended to restart the server or run the command gpupdate /force in the command prompt as an administrator.
3. Check microphone access on the server itself
Settings → Privacy & security → Microphone
"Microphone access" and "Let desktop apps access your microphone" must be turned on.
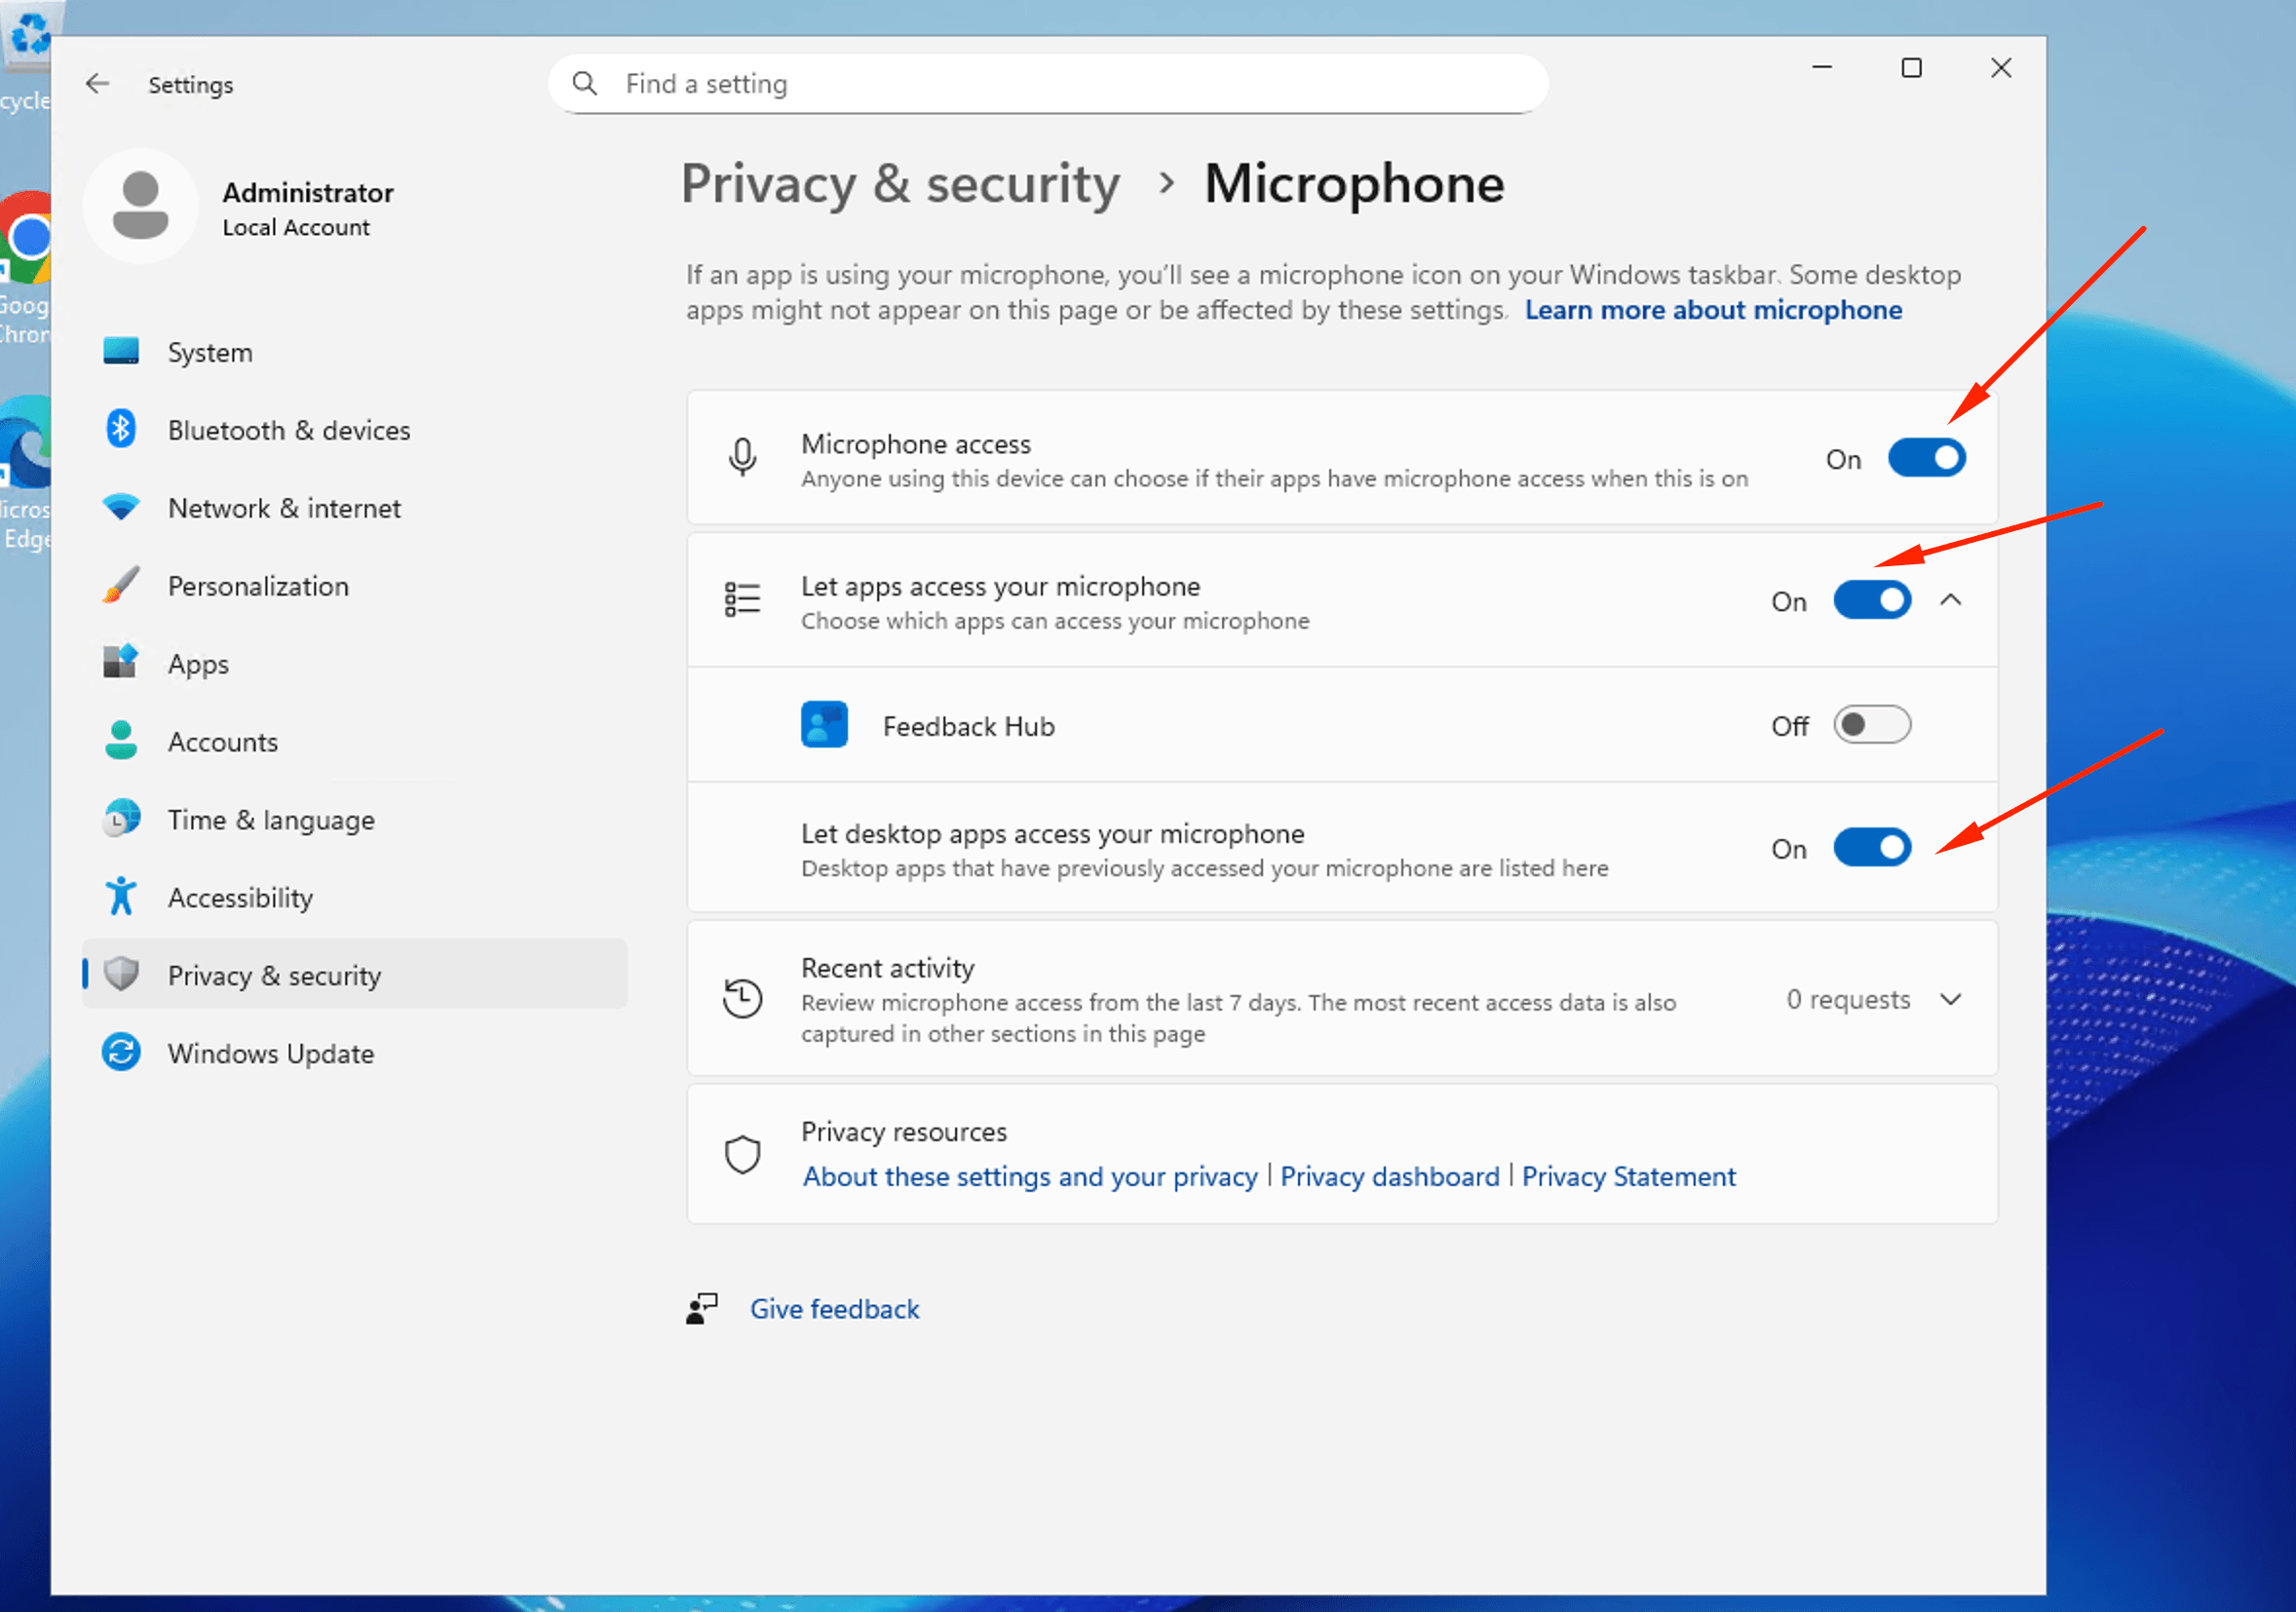
If all three points are fine, but the input device still does not appear, move on to the main cause.
Main Step: Installing the Remote Desktop Session Host Role
This is the only way to make Windows Server create a virtual audio recording device for an RDP session.
Important: For a scenario where "only one administrator uses the microphone," installing the role does not automatically mean you need to purchase licenses right away — after installation, a 120-day grace period applies, during which the server technically does not require licensing (although formally CALs are still required for long-term use under the terms of the license agreement).
Step-by-Step Installation via Server Manager
- Open Server Manager → Manage → Add Roles and Features
- In the wizard, select Role-based or feature-based installation → Next
- Keep the current server selected → Next
- At the "Server Roles" step, check Remote Desktop Services
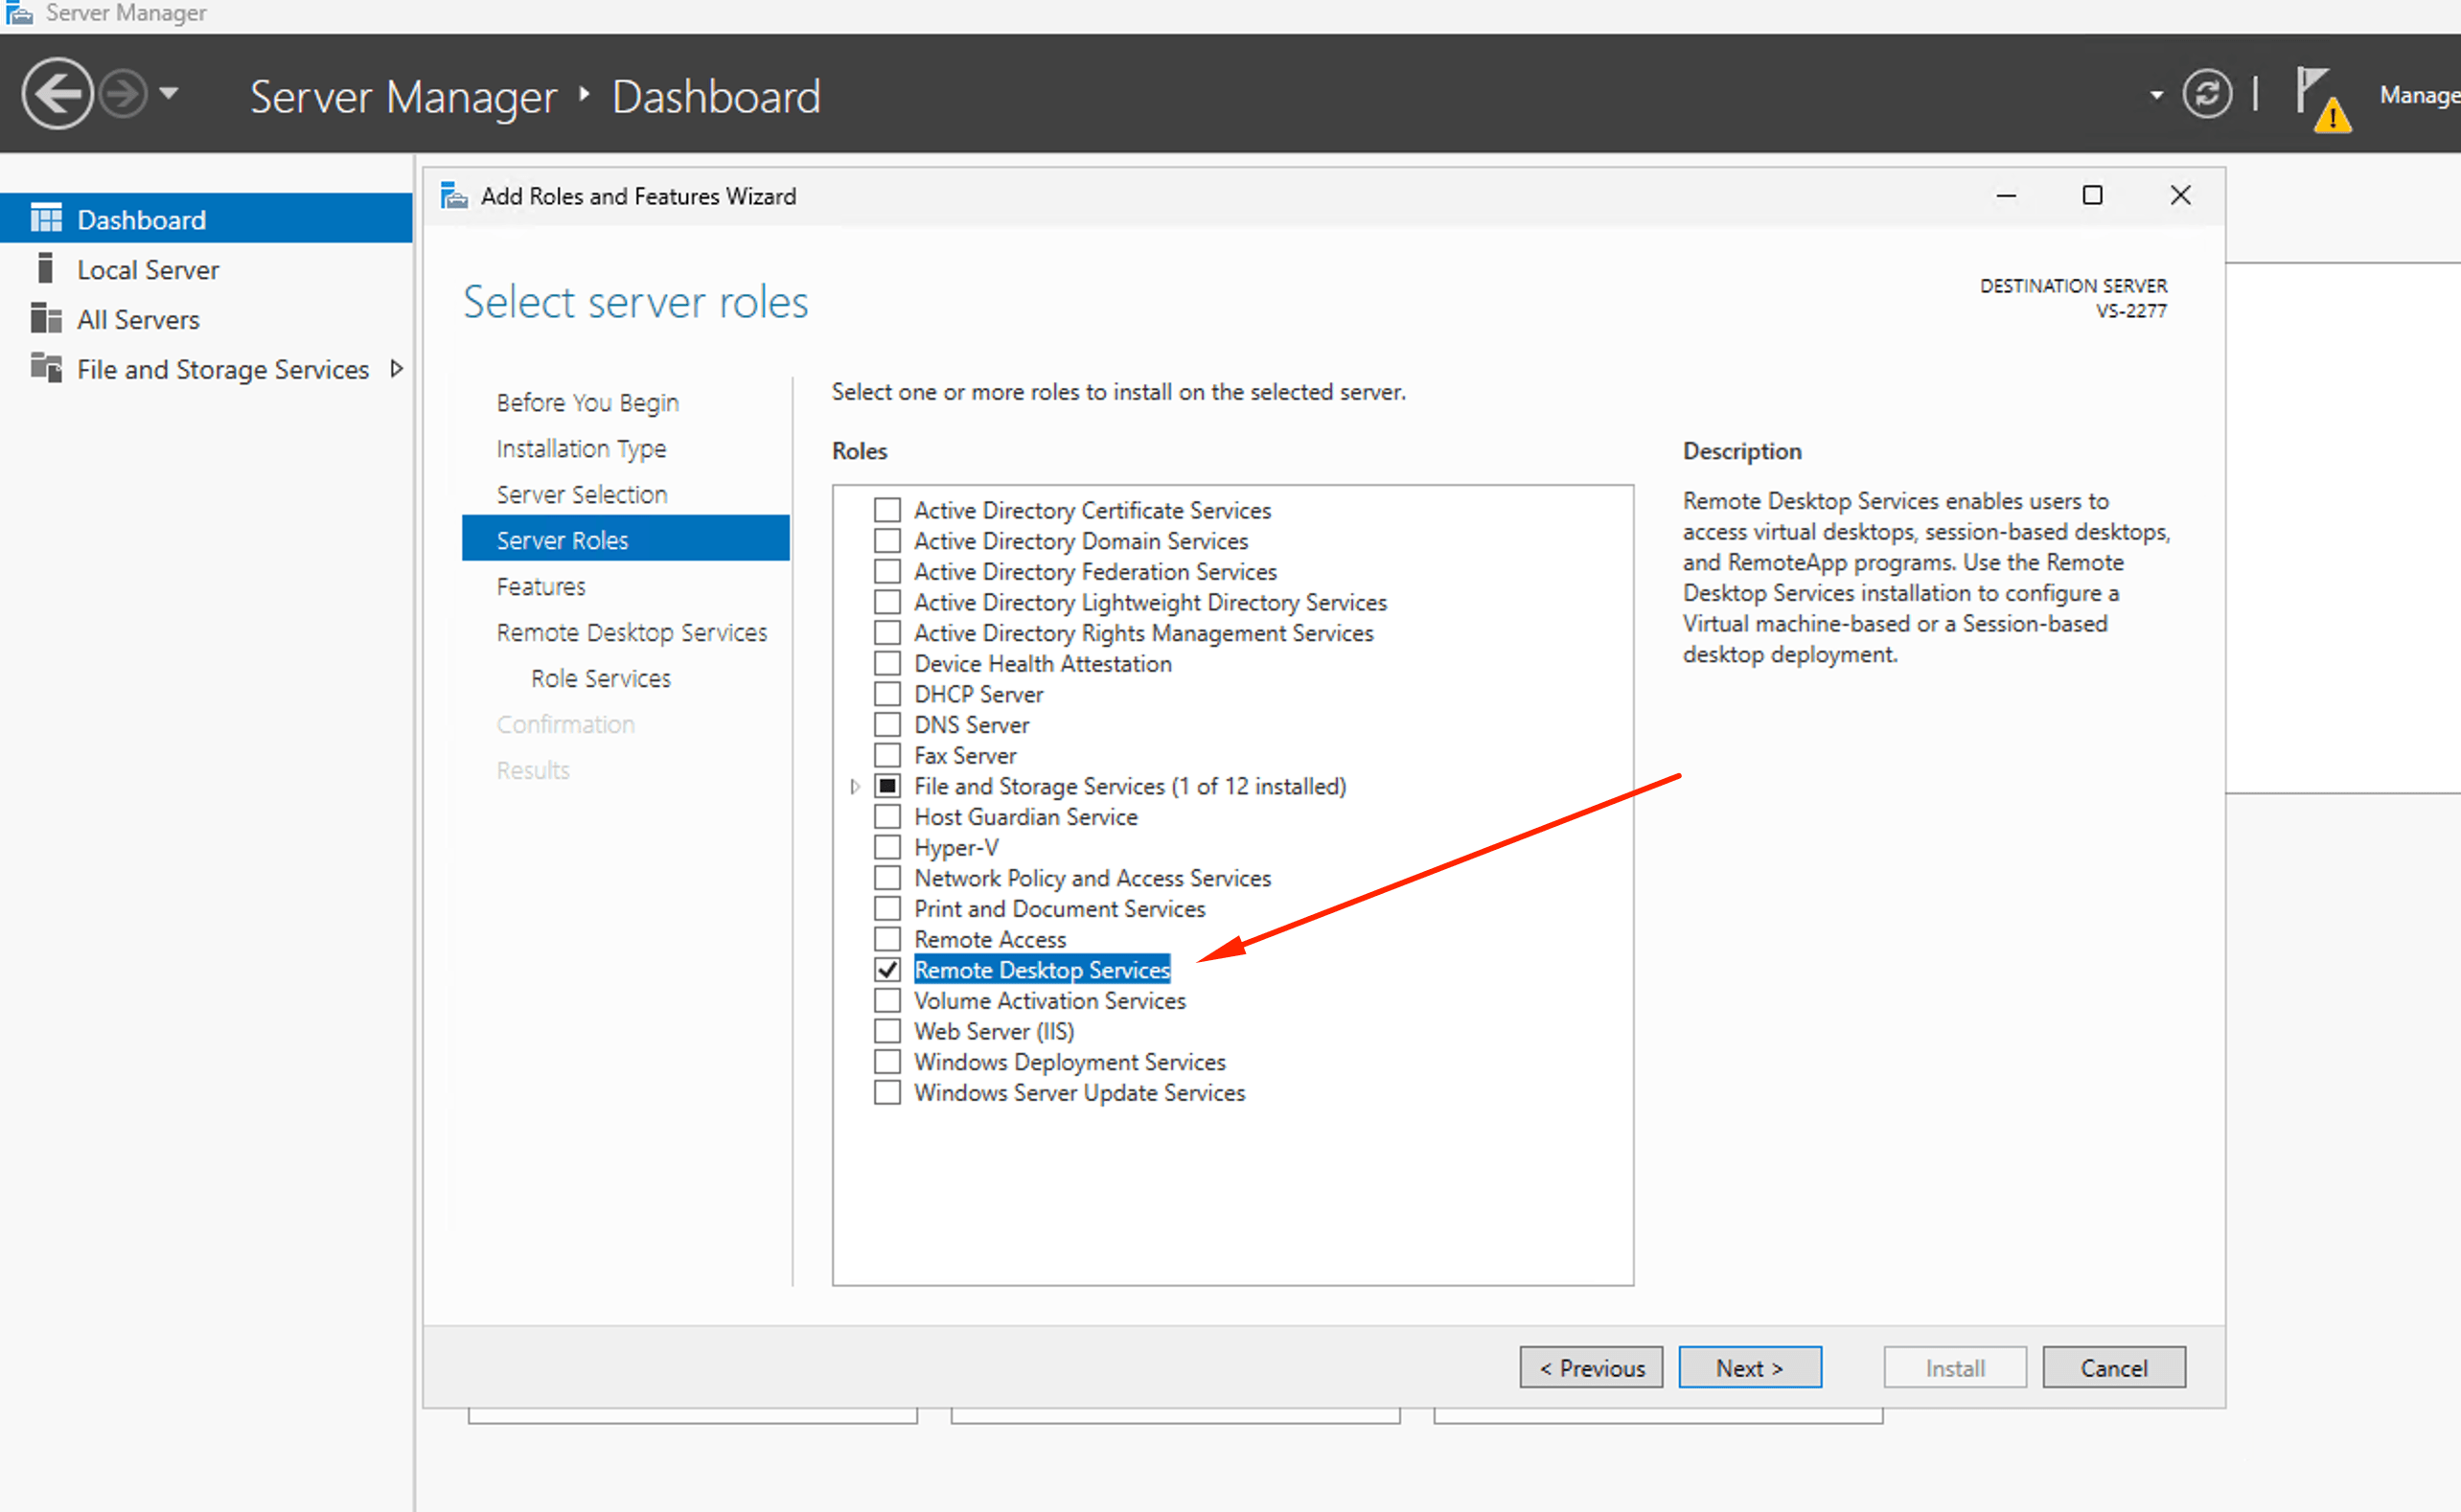
- In the pop-up dialog, click Add Features → Next → Next
- At the "Role Services" step, check Remote Desktop Session Host
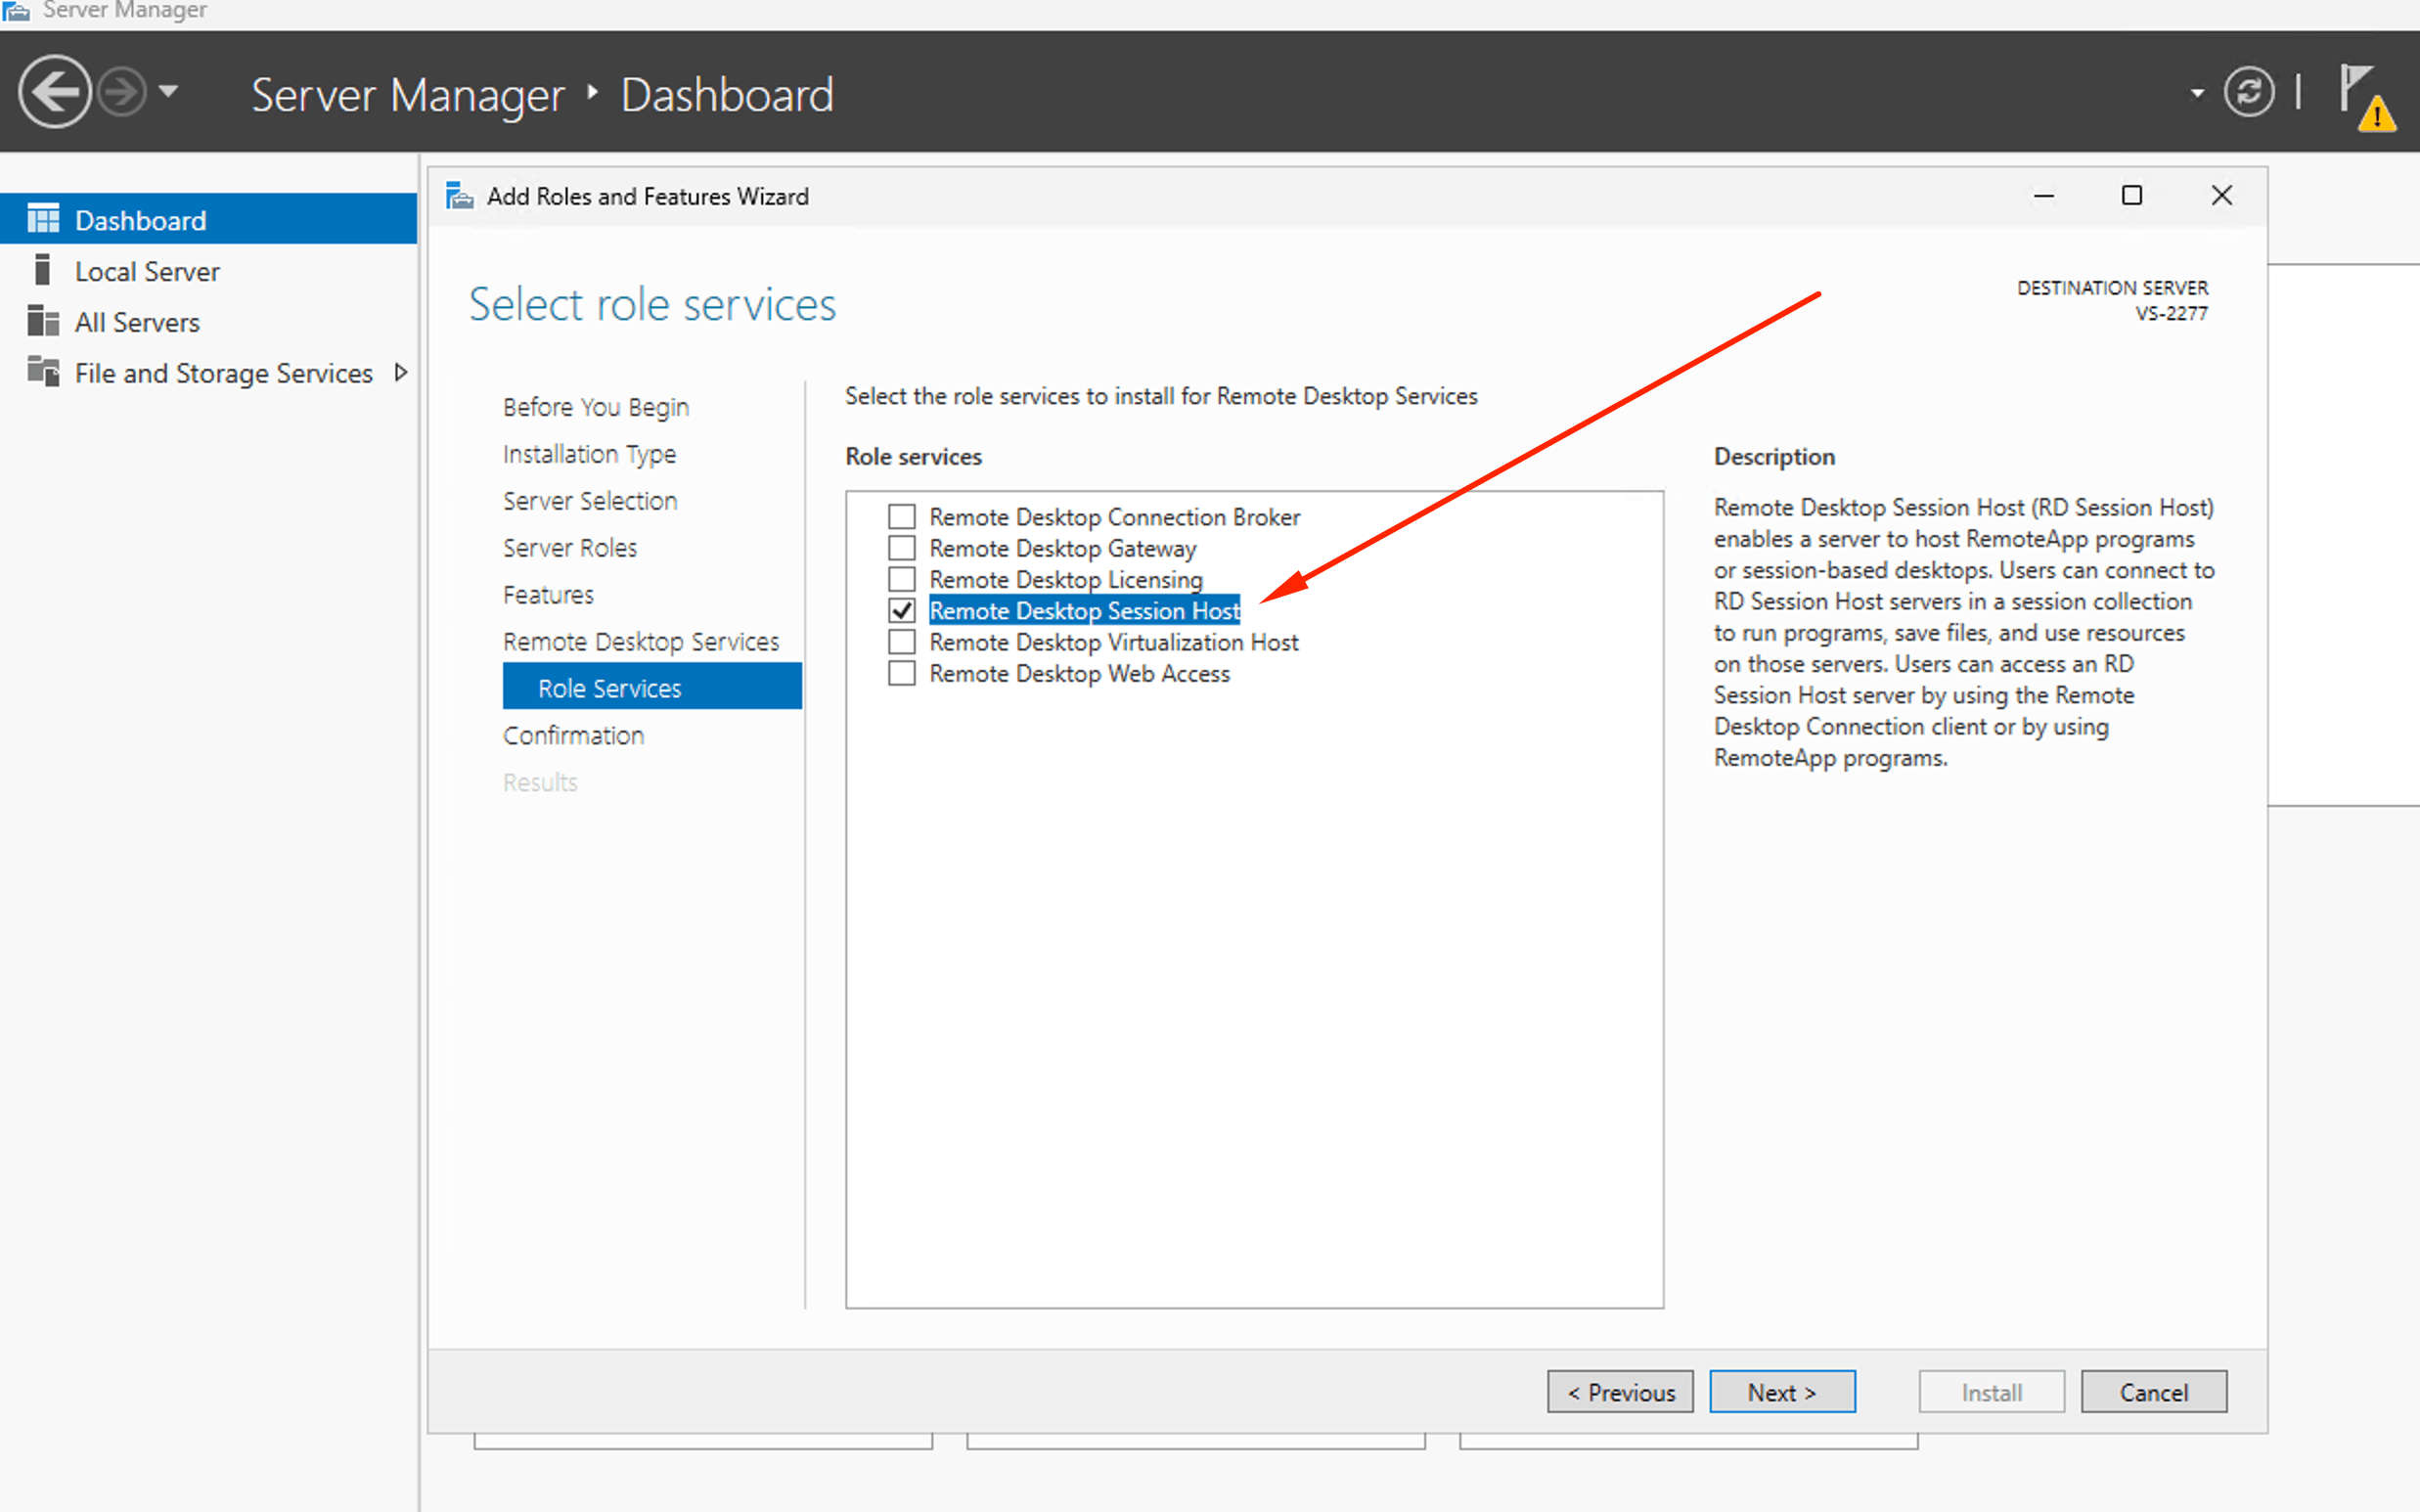
- Confirm the installation with an automatic server restart
- Wait for the reboot to complete (may take up to two cycles)
Verifying the Result
After restarting, reconnect via RDP with the microphone enabled in the client settings.
Check:
System → Sound → Volume
In the "Input" section, a real device should now be displayed instead of "No input devices found."
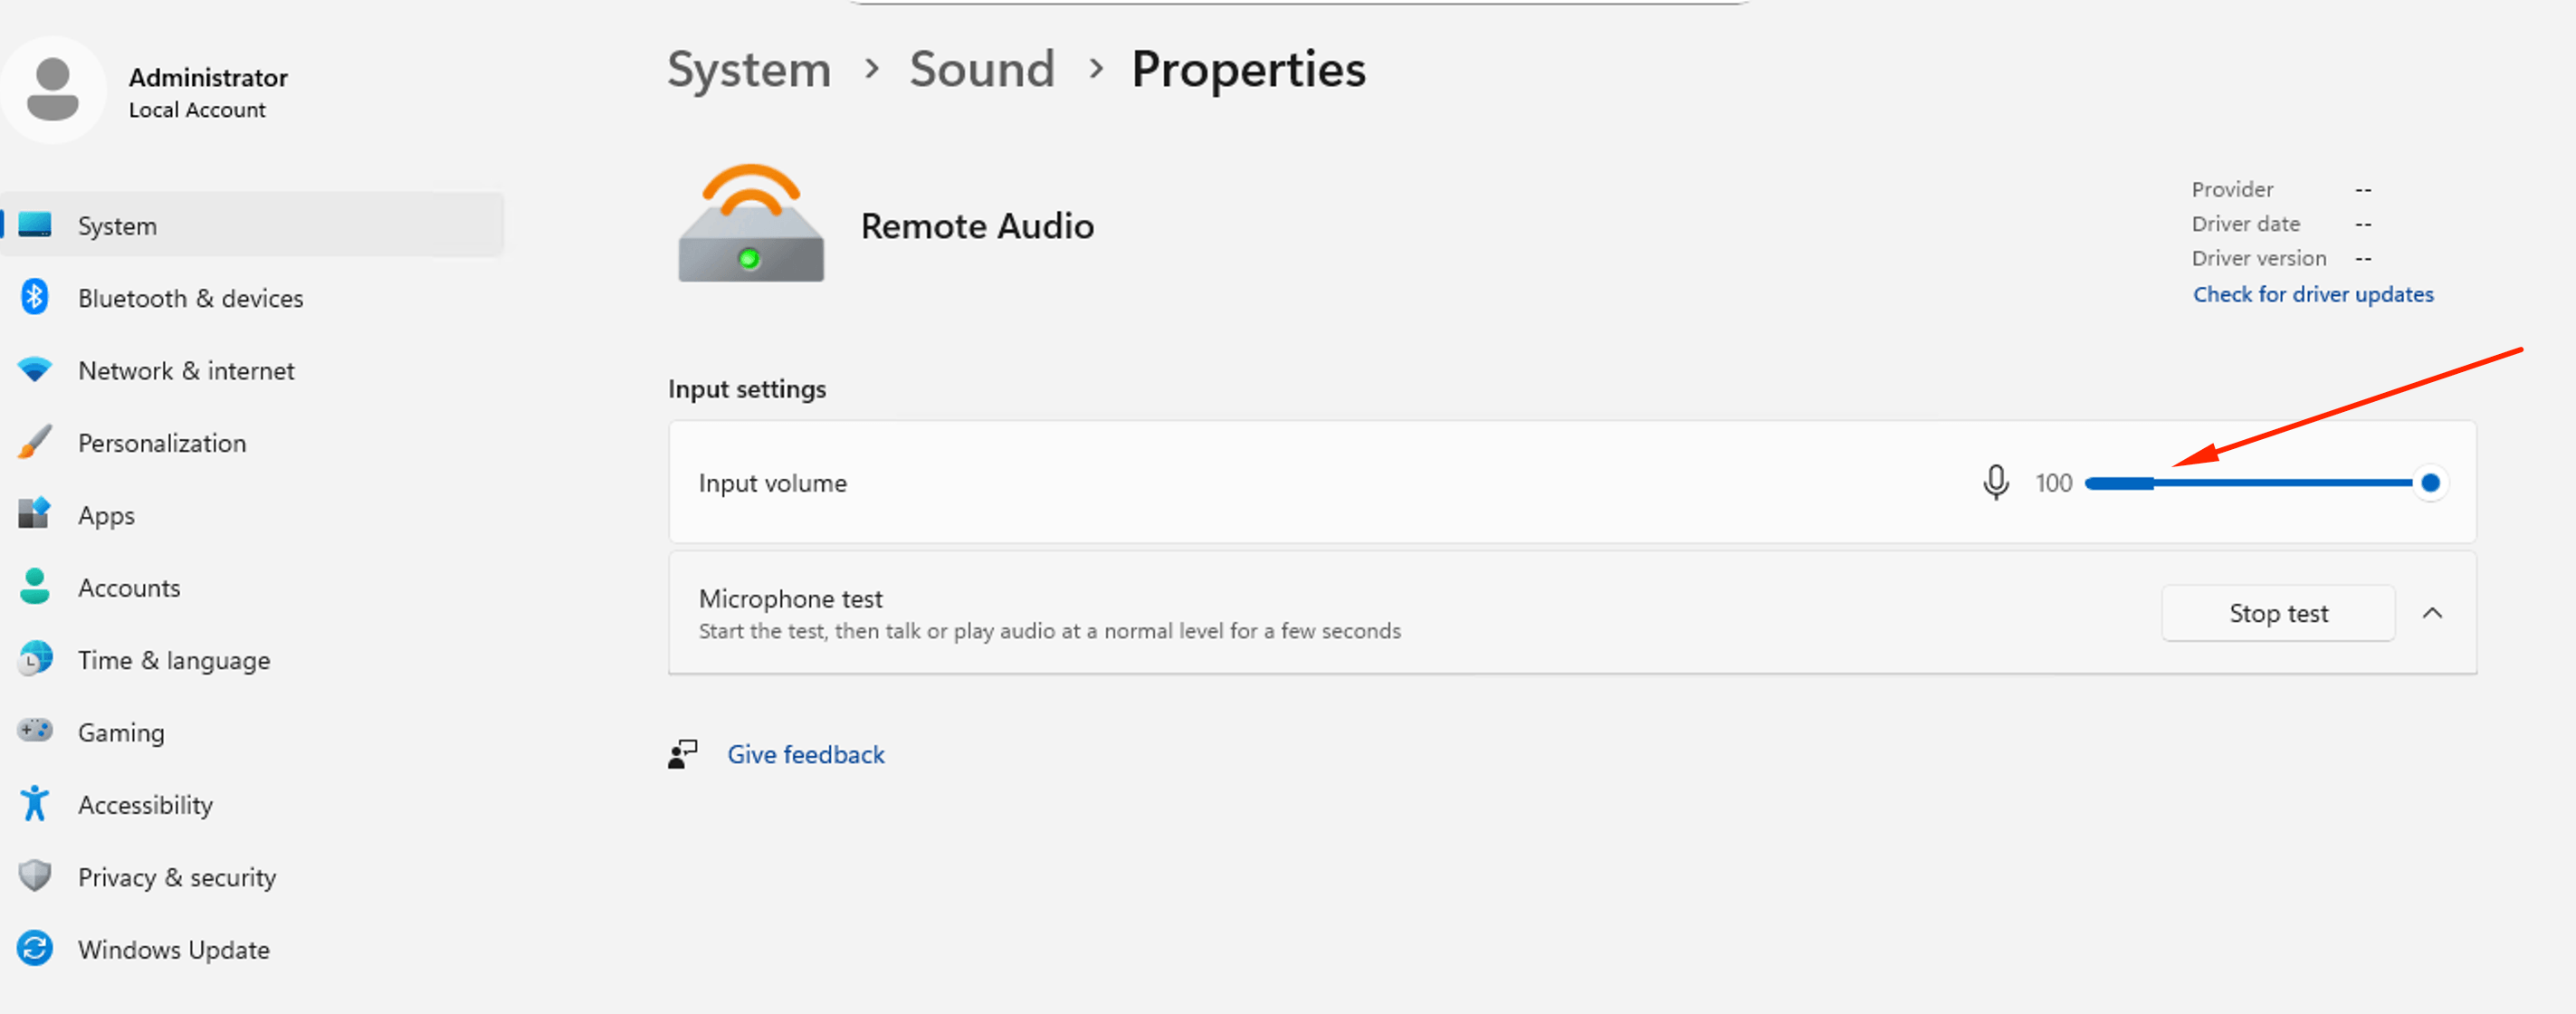
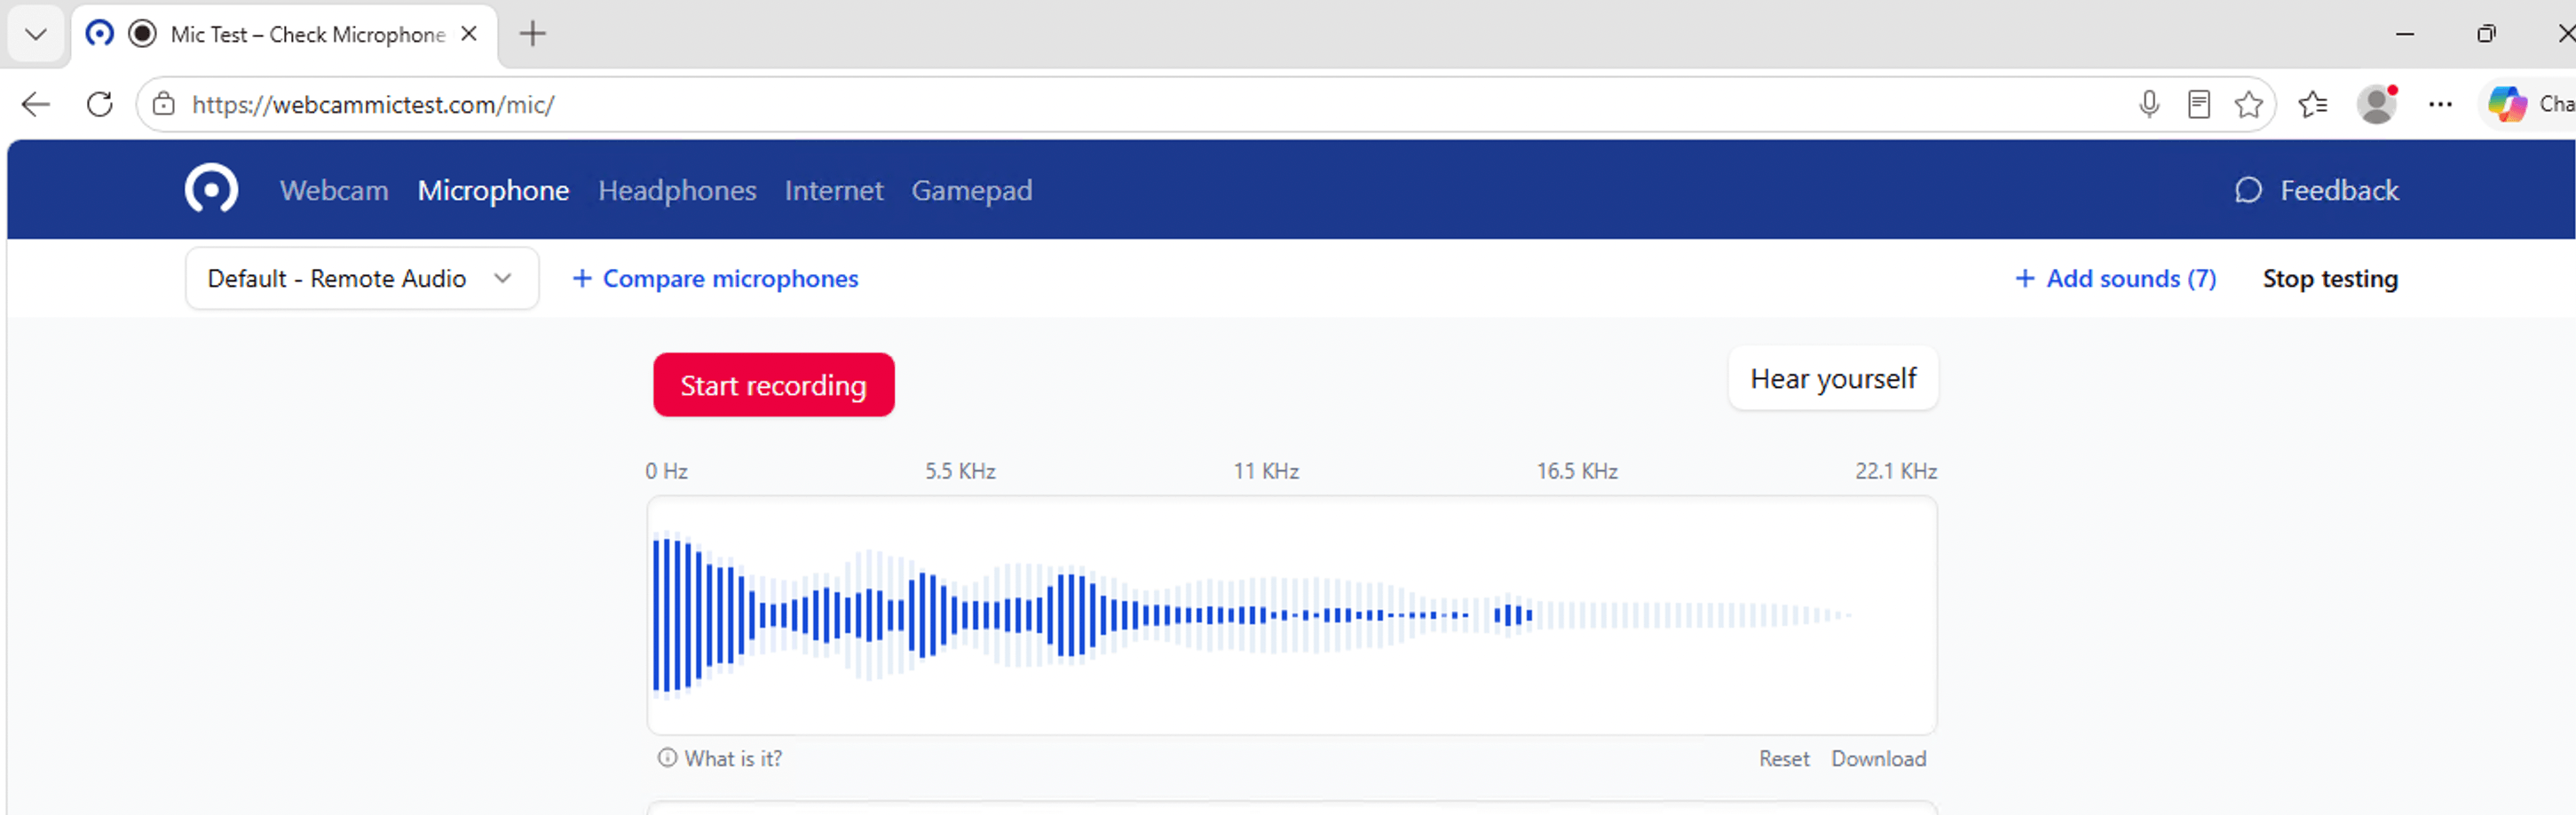
Test the microphone on a test website, such as webcammictest.com, or in a real application (Zoom, Teams, etc.).
If the Browser Still Does Not See the Microphone
Sometimes Windows at the system level detects the device, but a specific browser does not. In this case:
- Check the lock icon 🔒 in the address bar → Microphone → set to Allow
- Check
chrome://settings/content/microphone— the device should be selected by default, and the site should not be listed under blocked sites - Completely restart the browser — it may have cached the list of devices before the virtual RDP microphone appeared
- Ensure that the browser itself is present in the list of applications with microphone access (Settings → Privacy & security → Microphone)
That's it! After performing the steps above, the microphone should work properly over RDP on your server. If you still encounter issues, please contact our support team through your personal account.